Make your own animation!
EQUIPMENT:
For anyone who wants to do traditional hand-drawn animation and does not have the equipment for creating it, here's a list of the minimal animation equipment required...
For anyone who wants to do traditional hand-drawn animation and does not have the equipment for creating it, here's a list of the minimal animation equipment required...
FLIPBOOKS:
Flipbooks are essentially small, bound pads of blank paper. ("Post-it" notepads are good too!) These need to be drawn in sequentially, page after page. Each page drawing will need to be slightly different from the previous one, meaning that when the pages are rapidly flipped the drawings will give the appearance of moment. (For students on the 2D Academy's "Animation Masterclasses in Animation & Production" course, a blank flipbook will only be needed for "Class 1" of "Module 1".)
Flipbooks are essentially small, bound pads of blank paper. ("Post-it" notepads are good too!) These need to be drawn in sequentially, page after page. Each page drawing will need to be slightly different from the previous one, meaning that when the pages are rapidly flipped the drawings will give the appearance of moment. (For students on the 2D Academy's "Animation Masterclasses in Animation & Production" course, a blank flipbook will only be needed for "Class 1" of "Module 1".)

Young student flipbooks, created at the start of their first-ever animation class.
LIGHTBOXES:
As several layers of drawings are often used during the animation inbetweening process, it is good to have a backlit device that will allow you to see through all the layers at the same time. Any lightbox will do but an A4 size LED Adjustable Illuminated Tracing Lightbox (via Amazon) is perfectly fine...
As several layers of drawings are often used during the animation inbetweening process, it is good to have a backlit device that will allow you to see through all the layers at the same time. Any lightbox will do but an A4 size LED Adjustable Illuminated Tracing Lightbox (via Amazon) is perfectly fine...

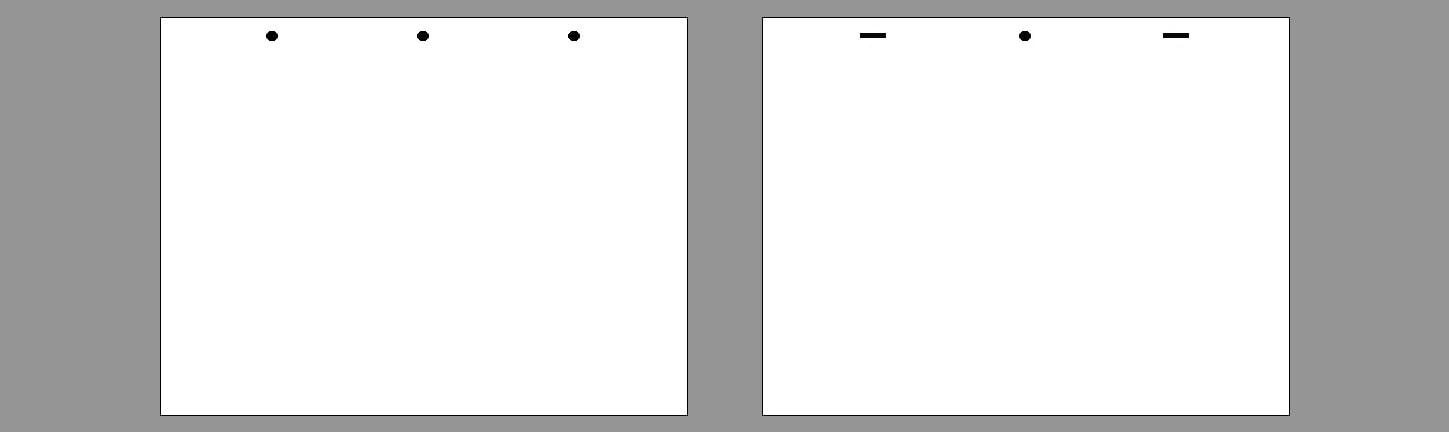
PEGBAR:
In order that animation drawings be consistently registered with one another it is necessary to have an animation pegbar taped to your lightbox. A recommended pegbar, available from Lightfoot in the USA and elsewhere, is the "three round hole" one, seen below. This peg arrangement is compatible with most inexpensive paper punches that can be found any any office supply store. Professional animators, on the other hand, will use the "Acme" pegbar system.

"Round hole office" and "Acme" pegbars.
NOTE: A cautionary comment here from Richard Sternberg, a colleague in the ANIMAKERS network: "One thing to be aware of when using the Lightfoot 3 hole peg bars is you want to make sure you get a true 1/4" hole punch. A lot of office store punches are 9/32". Which doesn't seem like much of a difference, but you can get some drift in the registration. I know the Trident punches are true 1/4", but they also tend to only punch 5 sheets at a time."
ANIMATION PAPER:
To match the registration pegbar of choice it is important that all animation is done on pre-punched paper. The most economic letter size paper for the three round hole system can also be found via the Lightfoot website. (Note: Paper for the three round hole office punch system can also be bought at any local office supply store too - just make sure to buy plain punched paper however, not lined, and use a standard 3-hole office punch to create the peg holes in it!) However, if you purchase a professional level "Acme" pegbar, you will need Acme-punched animation paper instead.
"Round hole office" and "Acme" punched paper.
PENCILS, ERASERS & PENCIL SHARPENERS:
Standard pencils, erasers and manual pencil sharpeners will do. However, an electric pencil sharpener which will save a lot of time when you do the large amount of pencil drawings needed to make your animation work.
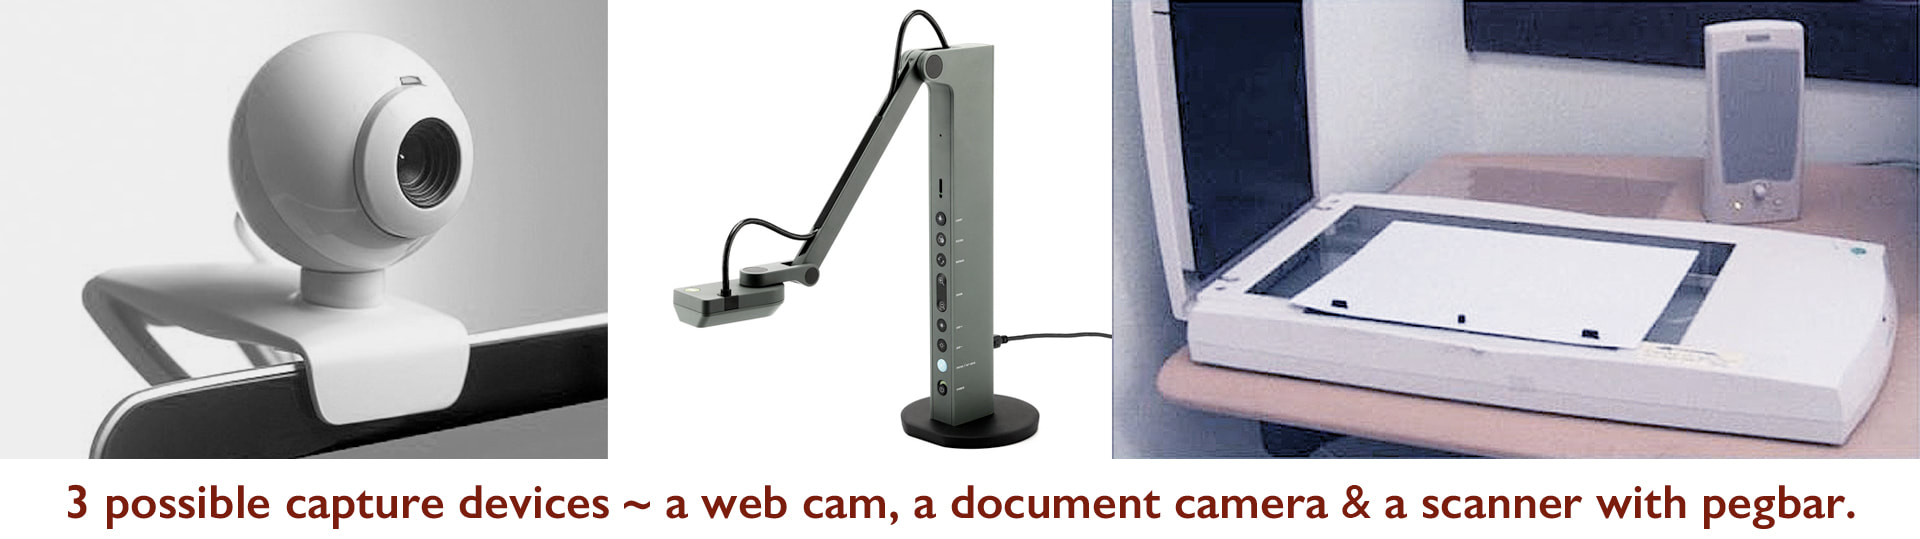
ANIMATION CAPTURE EQUIPMENT:
When finished, animation drawings need to be captured frame-by-frame and rendered to video tape for reviewing. There's no one-stop-shop way of doing this unfortunately. So, students will have to be imaginative in how they do it. The following are some suggestions for doing this...
i) Flipbooks can be filmed by any digital phone video camera. Have one person flip the drawings while another captures it on video. Film the action as closely as possible and repeat the flipped animation at least 3 times during the one shot.
ii) To film animation drawings the following ideas will work...
The simplest and least expensive way to capture animation drawings is to use a document capture camera or webcam that is hooked up to a computer with single-frame capture software loaded into it. Your LED lightbox with attached pegbar makes a perfect base for the drawings to be filmed on individually. Cameras will need to be in a fixed position - ideally on a small desktop tripod - while all the drawings are filmed, otherwise the animation will jump around on the screen. A film capture app that enables you so shoot separate single frames at a time, while then rendering out to 24 frame per second video, will also need to be connected to the camera and computer. The following video, by cut-paper animator, Kendra Fleischman, will give you some ideas how to rig up a phone or iPad camera to film your drawings...
NOTE: Any of Kendra's suggested approaches are good for capturing cut-out animation. However, you will need to adapt it for capturing your individual 2D animation drawings. Just remember to use your LED tracing tablet, with pegbar attached, as the base underneath - and tape things down while you are capturing, so that nothing moves. She uses the "Stop Motion Studio Pro" app on her phone or iPad to capture frame-by-frame action and create her videos. But you can use any app that captures in the same frame-by-frame way and renders out to video at 24 frames per second.
Scanners with a suitable pegbar taped to the scanning area for registration are a good alternative. That way individual drawings can be imported in to a computer, where a film editing program like "Adobe Premiere Pro", "Final Cut Pro" or similar can combine them and render them out toa 24 frames per second video.